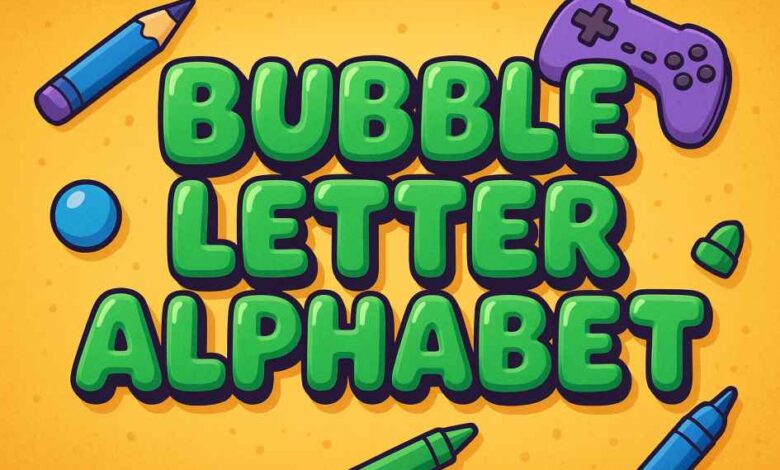
The bubble letter alphabet is one of the friendliest, most playful lettering styles you can learn — and it’s perfect whether you’re teaching kids, designing party banners, or adding personality to a journal or poster. This guide gives you everything you need: clear explanations, printable templates, step-by-step drawing instructions, styling tricks (shadows, outlines, 3D), font and digital options, classroom and local-printing tips, troubleshooting advice, plus a ready FAQ section for search engines and readers. Throughout, I’ll use the term bubble letter alphabet naturally so the article ranks for people searching for templates, how-tos, and creative uses.
What is the Bubble Letter Alphabet?
The bubble letter alphabet refers to letters drawn with very rounded, inflated shapes — as if each letter were a soft balloon or bubble. Unlike skinny handwriting or rigid block letters, bubble letters emphasize wide curves and thick strokes that create roomy interiors, making them ideal for coloring, cutting out, stenciling, and eye-catching headings.
Key characteristics:
- Rounded outer contours (no sharp corners).
- Thick, even stroke width inside each character.
- An empty area inside that can be filled, designed with patterns, or given shadows.
- High readability when used for short words, titles, and large display text.
Because of these features, bubble letters are approachable for beginners (including kids) and versatile for creative projects like banners, name tags, stickers, and craft cutouts.
Why Learn Bubble Letters? Benefits for Kids, Crafts & Design
Learning the bubble letter alphabet is more than a fun doodling exercise — it brings cognitive, practical, and visual benefits:
- Motor-skill development for kids: Tracing and drawing wide bubble shapes helps young learners practice hand control and consistent pressure, which supports handwriting skills.
- Design impact: Big, rounded letters naturally draw attention and read well at a distance, making them perfect for posters, classroom signage, and birthday banners.
- Low barrier to entry: Bubble letters don’t require precise serif knowledge or complicated calligraphy strokes; basic shapes and even spacing are enough to make them look good.
- Creative playground: Interiors can be decorated with patterns, stickers, or colors; outlines can be stylized with shadows and 3D effects, widening the range of visual treatments for crafts or branding.
Because printable templates and how-to tutorials for this topic are commonly sought by parents, teachers, and crafters alike, combining templates with quick lessons will make your content especially appealing and shareable.
(Competitor note: Most high-ranking resources in this space fall into two categories — printable template collections and step-by-step drawing tutorials. Combining both types in one article is a strong strategy.) Freebie Finding Mom Lettering Daily
Free & Printable Bubble Letter Alphabet Templates (Download A–Z PDFs)
One of the main reasons people search for the bubble letter alphabet is to get ready-to-print letters for crafts and classroom use. A well-structured template section should include:
- Full A–Z uppercase set: Big block-style outlines that are easy to cut out and color.
- Lowercase set (optional): Many users only need uppercase, but lowercase templates are useful for handwriting practice.
- Multi-size sheets: Offer a single giant letter per page for banners and a compact A–Z on one page for stickers or small projects.
- Tracing guides: Outlines with faint inner lines so beginners can trace before drawing freehand.
Why offer both A4 and US Letter versions? Users expect printable compatibility with local paper sizes — A4 is common in many countries while US Letter is standard in the United States. Supplying both formats removes friction for global readers and improves click-through and download satisfaction.
Note: Many free collections and creative marketplaces provide printable bubble alphabets; however, they vary in style and licensing. If you provide your own printable set, make it clearly labeled for personal/classroom use and include instructions for resizing or printing multiple letters per page. You can find many free template bundles and lists on craft blogs and educational websites — downloadable sets are something people really enjoy. woojr.com Freebie Finding Mom
Step-by-Step: How to Draw Bubble Letters (Beginner’s Method)
Drawing the bubble letter alphabet yourself is fast, and once you know the method you can customize each letter’s personality. Below is a beginner-friendly step-by-step method that works for all uppercase letters.
Tools you’ll need
- Pencil (HB or 2B) and eraser for practice.
- For the finishing outlines, use a black felt pen or a fine-tip marker.
- Ruler (optional) for consistent height guidelines.
- Thick paper or cardstock for final projects.
7 simple steps to build any bubble letter
- Draw baseline & capline: Lightly sketch two horizontal guide lines to set the letter height (top capline and bottom baseline).
- Block skeleton (light): Draw a simple block or stick version of the letter (the quick skeleton). For “A” that’s a triangle shape with a crossbar; for “S” it’s two curves stacked.
- Include an external bubble shape: Create a rounded, puffy outline around the block’s frame — think of it as putting a soft padding that hugs the edges of the block while rounding off sharp corners.
- Ensure even thickness: Keep the “bubble wall” roughly the same thickness around the letter to maintain the bubble feel.
- Remove the inner skeleton: After ensuring the outer shape is properly balanced, get rid of the internal block outline, retaining just the smooth bubble shape.
- Add inner aperture (optional): For letters with enclosed interiors (like “O” or “P”), you can draw an internal contour to create a double-outline effect for coloring or shading.
- Finalize with ink and shading: Trace with a marker, then add a shadow or highlight (see next section) and erase remaining pencil marks.
Practice drill
Pick a single letter and repeat the steps five times, each time varying the wall thickness or curvature slightly. This builds muscle memory and stylistic control.
Visual progressions (step images or short GIFs) significantly help learners here; if you can, include 3–6 step images for several letters (A, S, M, O, B) to show different structural challenges.
Quick Tricks: Add Style — Shadows, Outlines & 3D Effects
Once you have the bubble letter alphabet forms down, these quick tricks make the letters pop and give designs more depth.
1. Drop shadow (simple)
- Decide on a light source direction (e.g., top-left).
- Draw the same letter shape offset down and right (or consistent with your source).
- Fill the offset shape with a darker tone or cross-hatching.
- Keep the shadow shape solid — this is the easiest 3D illusion.
2. Long shadow (modern)
- From the original letter outline, extend straight parallel lines from edges in the chosen direction (often 30–45 degrees).
- Close the long shadow shape and fill or shade it for a graphic, poster-like effect.
3. 3D pop-out
- Duplicate the letter’s outer contour slightly offset (down-right).
- Join the matching outer points using straight lines to create the “side” surfaces.
- To create a sense of depth, use slightly varying shades for each face—apply the darkest tones to the faces that are farthest away and lighter shades to those that are closer.
4. Highlights & glossy finish
- Add one or two small crescent highlights on the top-left of each letter to mimic a glossy surface.
- Use white gel-pen highlights on inked work for a sticker or balloon look.
These techniques are simple but powerful; many lettering tutorials and video creators demonstrate them step-by-step because they immediately boost visual interest. Including short demo clips or step images in your article raises reader confidence and time on page. (Art by RoYouTube)
Bubble Letter Fonts & Digital Options (Top free + paid fonts)
If you prefer working digitally or want a quick, consistent bubble look across a project, bubble-style fonts are plentiful. There are both free and premium options; choose based on use case (personal or commercial).
Types of digital approaches
- Bubble display fonts: Pre-designed typefaces that mimic hand-drawn bubble letters — great for titles and headings.
- Lettering elements: Graphic element packs (e.g., in design apps) with premade bubble letters as art assets.
- Font generators & tools: Online generators let you type text and instantly download bubble-text images for print or web.
Popular free and paid examples (style categories)
- Round block bubble: typefaces are thick and bold, making them very easy to read on posters.
- Playful cartoon bubbles: More characterful, with uneven stroke widths for an organic feel.
- Balloon-style script hybrids: Merge bubble shapes with script flow for decorative wordmarks.
- Popular free fonts / Popular Paid fonts
There are many curated lists and font collections that gather dozens of bubble fonts in one place. For designers, checking licensing (personal vs commercial) is critical before using any free font in products or merchandise.
Creative Uses & Project Ideas (Teachers, Party Decor, Bullet Journals)
The bubble letter alphabet is wildly adaptable. Here are project ideas organized by the audience.
For teachers and classrooms
- Name-tags for desks (large single-letter cutouts).
- Word wall headings in bubble letters for vocabulary units.
- Lettering for bulletin-board titles and seasonal displays.
For parents & kids
- Birthday banners: print or hand-draw names using bubble letters, then color and string.
- DIY puzzles: write a word in bubble letters, cut into shapes, and have kids reassemble.
- Sticker sheets: print small A–Z bubble letters on sticker paper for craft use.
For hobbyists & designers
- Album or scrapbook titles with patterned fills (polka dots, watercolor wash).
- Logo mockups or social media post headers using bold bubble fonts and textured backgrounds.
- T-shirt or tote mockups (ensure fonts/artwork have commercial license if selling).
For bullet journals & planners
- Section headers, month names, and habit trackers: use bubble letters for emphasis and color coding.
Pair each project idea with a small how-to tip (e.g., recommended paper weight for banners; marker types for crisp outlines) to make the suggestions actionable.
Troubleshooting & Common Beginner Mistakes
Beginners often run into the same issues when learning the bubble letter alphabet. Here’s how to fix them.
Problem: Uneven wall thickness
Fix: Lightly measure the bubble “wall” with small tick marks around the skeleton before drawing the full contour to keep thickness consistent.
Problem: Crowded letter spacing
Fix: Keep wider letter spacing for bubble letters than you would for normal text — the inflated shapes need breathing room. Use baseline and capline guides and mark a neutral spacing line to align letter centers.
Problem: Flat-looking 3D
Fix: Reassess your light source — consistent shading across all letters will instantly sell the 3D effect. Add a thin highlight on the opposite side of the shadow to heighten contrast.
Problem: Messy inked outlines
Fix: Stabilize your hand by drawing in short, confident strokes instead of long wobbly lines. Alternatively, ink with a marker in one pass and allow drying fully before erasing pencil lines.
Problem: Letters look identical/boring
Fix: Introduce subtle variations — tilt one letter slightly, change the curvature of another, or play with interior patterns. Small differences create handmade charm without losing legibility.
Conclusion
Learning the bubble letter alphabet is easy, highly adaptable, and ideal for activities in the classroom, celebrations, and creative projects. Whether you use printable templates, draw letters freehand, or work digitally with bubble fonts, a small investment of practice yields big visual payoff.
Suggestions for calls to action that you can add at the conclusion of your article:
- Invite readers to download the practice pack and try drawing five letters today.
- Encourage teachers to adapt the tracing sheet into a 10-minute classroom warm-up.
- Ask hobbyists to post their finished pieces on social media with a custom hashtag (for community-building).
FAQs
Q: Which type of paper is ideal for printing bubble letters?
A: For simple coloring and crafting, standard 80–120 gsm paper works. For durable cutouts and banners, use cardstock (160–300 gsm). Use the weight that matches your project needs.
Q: Can kids trace bubble letters?
A: Absolutely. Tracing templates with faint inner lines or dotted outlines help children learn letter shapes and build motor control before drawing freehand.
Q: How can I make my bubble letters look 3D?
A: Choose a consistent light source, add an offset duplicate of the letter shape to form the “side” faces, and shade each face with progressively darker tones. A small highlight on the near edge increases the sense of volume.
Q: Are bubble letter fonts free to use for product designs?
A: Many bubble fonts are free for personal use, but commercial use often requires a license. Always check the font’s licensing terms before using it on merchandise or products.
Q: Should I use uppercase or lowercase bubble letters?
A: Uppercase bubble letters are more common for titles and decorative uses because of their uniform height and visual impact; lowercase can be used for a softer, friendlier look in longer words or notes.